How to Grow Microgreens at Home in India: Step-by-Step Beginner's Guide
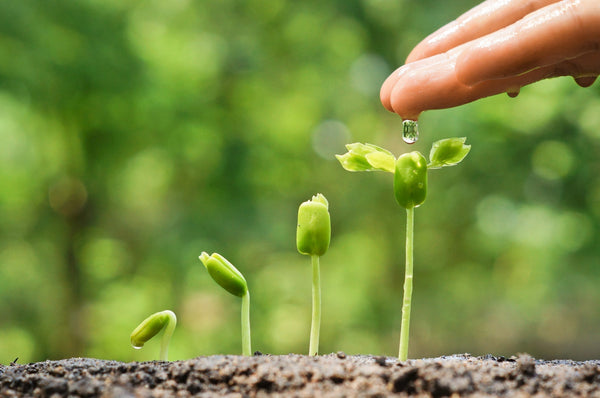
Microgreens are young vegetable and herb seedlings, cut about one to two weeks after sowing, once their first leaves have opened. You eat the stem and leaves and leave the roots behind. That is the main difference from sprouts, which are germinated in water and eaten whole, seed and all. For a quick background read, see this short introduction to microgreens on Vikaspedia, a government agriculture knowledge portal.
The good news for anyone learning how to grow microgreens at home is that the whole project fits on a windowsill. You need a shallow tray, a growing medium, seeds, water and bright light. No garden bed, no deep pots and no long wait. This guide walks through the process as a day-by-day timeline, then covers growing times by variety, Indian weather, and the problems beginners run into most often.
Quick Facts Before You Start
- Time to harvest: usually 7-14 days from sowing. Radish and mustard sit at the quick end, beetroot and spinach at the slow end.
- Space needed: one shallow tray on a windowsill, a shaded balcony ledge or a kitchen shelf.
- Light: bright indirect light or a grow light. Harsh midday sun is more likely to scorch than help.
- Temperature: around 18-24 degrees C is ideal. Warmer weather works if the tray has shade and airflow.
- Skill level: beginner. The method is the same for almost every variety.
What You Need to Grow Microgreens at Home
- A shallow tray with drainage holes, plus a second tray or plate underneath to catch water. A microgreen tray set with holes works well, but any clean, shallow container with holes in the bottom will do.
- A growing medium. Coco peat or a light potting mix, about 2-3 cm deep. If your coco peat comes as a dried block, soak it, fluff it up and rinse it once or twice to wash out excess salts.
- Seeds sold for microgreens. Choose food-safe, untreated seeds. Seeds meant for field sowing are sometimes coated with fungicide, which you do not want on a crop you will eat raw. You can see the full range in our microgreen seeds collection.
- A spray bottle for misting after sowing.
- A cover for the blackout stage: a second tray, a plate or any light-proof lid.
- Clean scissors for harvesting.
- Optional: an LED grow light, if your home does not get bright light near a window.

How to Grow Microgreens at Home: A Day-by-Day Timeline
Exact timing depends on the variety and the temperature, but nearly every microgreen follows the same pattern: sow, keep dark and damp, bring into light, water from below, then cut.
Day 0: Prepare the Tray and Sow
- Fill the tray with 2-3 cm of damp medium and level it with your palm. Press lightly. Do not pack it down.
- Soak larger seeds such as pea, sunflower and fenugreek in water beforehand (see the table below). Small seeds like radish, mustard and broccoli can go in dry.
- Scatter the seeds in a single, even layer. Microgreens are sown much closer together than garden vegetables, so the seeds should nearly touch, but not sit in piles. An even layer gives good airflow and an even cut later.
- Press the seeds gently into the surface. Small seeds can stay uncovered or get a very thin dusting of medium. Larger seeds can be pressed in or lightly covered.
- Mist until the surface is evenly damp.

Days 1-3: The Blackout Phase
Cover the tray with a second tray or a plate so the seeds stay dark and humid. For pea and sunflower, rest a light weight on the cover for the first couple of days, because it helps the roots grip the medium. Lift the cover once a day to check, and mist if the surface looks dry.
Most varieties are ready for light after 2-4 days, when you can see pale yellow shoots pushing up and the cover starts to lift.
Days 3-5: Bring the Tray Into the Light
Remove the cover and move the tray to bright, indirect light. The pale shoots turn green within a day or two. A window that gets gentle morning light works well, as does a bright shaded balcony. If you use a grow light, keep it about 20-30 cm above the tray for 10-12 hours a day.
Avoid hot afternoon sun through glass. It can heat the tray quickly and dry out the medium. Turn the tray a half circle each day so the shoots grow evenly instead of leaning toward the window.
Days 4-10: Water Carefully
Water from below. Pour water into the tray underneath and let the medium soak it up for 15-20 minutes, then drain what is left. This keeps the leaves dry and lowers the risk of mold. The medium should feel damp, never soggy.
In most weather, once a day is enough. In hot weather you may need to check twice. If you prefer to mist from above, do it gently and early in the day.
Days 7-14: Harvest
Your microgreens are ready when the first leaves have fully opened, usually at 5-10 cm tall, and taller for pea and sunflower. The harvesting and storage steps are covered further down.
Microgreen Growing Times by Variety
These ranges are a general guide. Temperature, season and seed freshness can all shift them by a few days, so always follow the instructions on your seed pack.
| Variety | Soak seeds? | Blackout | Typical harvest | Good to know |
|---|---|---|---|---|
| Radish | No | 2-3 days | 6-10 days | Peppery and very fast. A good first tray. |
| Mustard | No | 2-3 days | 7-10 days | Sharp, spicy flavour. |
| Fenugreek (methi) | 6-8 hours | 2-3 days | 8-12 days | Mildly bitter, a familiar kitchen flavour. |
| Broccoli | No | 2-3 days | 8-12 days | Mild, slightly cabbage-like. |
| Sunflower | 6-8 hours | 3-4 days | 9-12 days | Nutty and crunchy. Use a weight on the cover. |
| Pea | 8-12 hours | 3-4 days | 9-12 days | Sweet and crisp. Sturdy stems, easy to handle. |
| Red amaranth | No | 2-3 days | 10-14 days | Tiny seeds, slower growth, deep red stems. |
| Beetroot | 4-8 hours | 3-4 days | 10-14 days | Earthy flavour. Germination can be uneven. |
| Palak (spinach) | 6-8 hours | 3-4 days | 10-14 days | Mild flavour. Slower and can sprout unevenly. |
| Wheatgrass | 8-12 hours | 2-3 days | 7-10 days | Grassy flavour. Cut at roughly 10-15 cm. |
Shop Microgreen Seeds to Grow at Home


How to Grow Microgreens in India: Season and Climate Tips
Microgreens can be grown all year in India, but the weather changes what you need to watch.
Hot Months (Roughly March to June)
Everything speeds up, so check the tray every day and harvest on the early side. Keep the tray in bright shade rather than direct heat, because the medium can dry out within a few hours. Water a little more often, but in lighter amounts.
Monsoon (Roughly June to September)
High humidity is the main risk, because it encourages mold. Keep air moving with an open window or a small fan placed nearby (not blowing straight onto the tray). Water from below instead of misting, and sow a little more thinly than usual.
Cooler Months (Roughly November to February)
Growth slows, especially in northern India, and germination can take a few extra days. Put the tray in the warmest bright spot you have, away from cold drafts, and give it time before deciding the seeds have failed.
Keep Ants Away
Ants love coco peat and will carry off seeds. Stand the tray on a stand whose legs sit in small bowls of water, or on a surface they cannot easily reach. If you are also setting up a balcony or terrace garden, our terrace gardening guide for beginners covers sunlight, containers and watering in more detail.
Common Problems and How to Fix Them
White Fuzz: Mold or Root Hairs?
This is the most common worry, and it is often a false alarm. Root hairs are fine, white, cotton-like threads that appear on the roots and base of the stems within a day or two of sowing. They look fuzzy but they are normal, and they disappear if you mist them.
Mold looks different. It forms grey or white patches that spread across the leaves, stems or medium, and it often smells musty. If you see mold, cut any unaffected plants right away, throw out the affected area, and improve airflow and watering next time. Do not eat microgreens from a moldy tray.
Seeds Are Not Sprouting
The usual causes are old seeds, a medium that is too dry or waterlogged, or temperatures that are too low. Check that the medium is evenly damp, make sure large seeds were soaked, and move the tray somewhere warmer if it is a cold spell.
Tall, Pale, Thin Stems
This means the seedlings are not getting enough light. Move the tray to a brighter spot or lower the grow light closer to the plants.
Seedlings Collapse or Turn Slimy at the Base
This is usually damping-off, caused by too much water, poor airflow or an unclean tray. Sow more thinly, water from below, and wash trays with hot soapy water between batches.
Patchy or Uneven Growth
Uneven sowing, uneven moisture or dry tray edges are the usual causes. Spread seeds as evenly as you can, rotate the tray each day, and check the corners when you water.
How to Harvest, Wash and Store Microgreens

- When to cut: once the first leaves have fully opened, typically 7-14 days after sowing. Taste a few stems. Many varieties are at their best just after the leaves unfold.
- How to cut: use clean scissors and cut just above the medium. Harvest when the leaves are dry, ideally in the morning.
- Washing: rinse gently under clean water before eating, then pat dry or spin dry.
- Storing: keep unwashed, dry microgreens in an airtight container lined with a paper towel in the fridge. They usually stay fresh for about 5-7 days. Wash them just before you eat them.
- After harvest: most varieties do not give a good second cut, so start a fresh tray instead. Add the roots and used medium to your compost or mix them into a pot with a little vermicompost. Wash the tray before the next batch.
Because microgreens are eaten raw, clean trays, fresh medium, clean water and washed hands matter more than any other tip on this page.
Do Microgreens Need Fertilizer?
Usually not. The seed holds enough stored energy to carry the plant through a 7-14 day cycle. If you grow in plain coco peat and want to give it a little extra, mix a small amount of fine, well-rotted vermicompost into the medium before sowing. Avoid strong chemical fertilizers, since you will be eating the whole plant within days.
Frequently Asked Questions
How long does it take to grow microgreens?
Most microgreens are ready to harvest 7-14 days after sowing. Radish, mustard and wheatgrass are on the faster side, while beetroot, spinach and amaranth take longer.
Can I grow microgreens without direct sunlight?
Yes. Bright indirect light from a window, or an LED grow light, is enough. Strong direct sun can burn young leaves and overheat the tray.
Can I grow microgreens indoors all year?
Yes. Growing indoors gives you steadier conditions than outdoors. You only need to adjust airflow and watering for the heat of summer and the humidity of the monsoon.
Can I grow microgreens without soil?
Yes. Coco peat is already soil-free, and jute or hemp mats and paper towels can also work as a growing surface. Soil-free setups dry out faster, so check moisture more often.
Do microgreens regrow after cutting?
Most do not regrow well enough to be worth waiting for. A fresh tray gives a better and safer harvest.
Can I reuse the growing medium?
It is better not to. Leftover roots and seed husks can carry mold and disease into the next batch. Compost the used medium and start with fresh.
Are microgreens the same as sprouts?
No. Sprouts are germinated in water without any growing medium and eaten whole within a few days. Microgreens are grown in a medium with light and cut above the roots after their first leaves open.
Which microgreens are easiest for beginners?
Radish, mustard and fenugreek (methi) are fast and forgiving. Pea and sunflower have larger seeds that are easy to handle, though they need a soak and a weighted blackout.
Ready to sow your first tray? Start with a fast variety like radish or mustard, or browse the full microgreen seeds range. If you would like to try a few flavours at once, the Microgreen Combo pack of 3 is an easy place to begin.